If I had to pick a current life philosophy that best describes my home design and renovation beliefs, it would most definitely say something like, “Paint can do magical things,” or “Paint: It’s Life-Changing,” or “There’s nothing that paint can’t fix.” Every single project this year has included a dramatic change using paint.
I’ve taken down a drop ceiling in our basement and painted the exposed ceiling, I’ve built built-in shelves and a murphy bed that I painted the most beautiful blue-gray color, painted all of my basement walls and paneling, and most recently, I’m painting my basement fireplace a bold black that pops in the very best way. And guys, we aren’t even halfway through the year!

All of these changes dramatically changed the look and the feel of the entire space. Prior to my basement being painted, it was a very juvenile blue that was the perfect color for my basement playroom, but in just a day or two of painting the walls and paneling SW Anonymous and it’s now a sophisticated space with dimension and contrast.
Paint can do magical things.
Our fireplace was whitewashed and bright a few days ago. Using a chip brush and a can of leftover enamel paint, and now I am creating a fireplace that shows old world elegance. That draws your eyes in without being overpowering.

Paint: It’s Life-Changing.
Each of my spaces that I’ve painted was lacking something. It either wasn’t “us” or it was missing the character that it deserved. With a $50 can of paint and a little elbow grease, these rooms and these pieces were transformed in a matter of hours.
There’s nothing that paint can’t fix.

DIY Board and Batten Tutorial // DIY Storage Bench using IKEA Besta
With a deep love for painting, I’ve come across so many tips and tricks through my experience. We’ll call them pro tips as I can very well consider myself a professional after painting my way through my three homes and countless DIY projects. 🙂 Today we’re chatting Painting 101. I’m sharing my best advice and the greatest tips and tricks to ensure you have the confidence to tackle your next paint project and dramatically change the feel of your room in a matter of hours!
What Sheen Do I Choose?
Most major paint retailers have a list of five different sheen types that they use: flat, eggshell, satin, semi-gloss, and gloss. The lower the sheen, the less shine you have. Flat being the most matte to a gloss or even a high-gloss that has maximum shine to it.
To decide what the best sheen is, there are two rules of thumb when it comes to the choices. First, the lower the sheen, the more imperfections that are visible. If you have textured walls or ones that have seen better days, it is wise to bump up your sheen to a satin to hide those imperfections. If you have smooth walls, it is great to choose a flat or eggshell sheen instead.
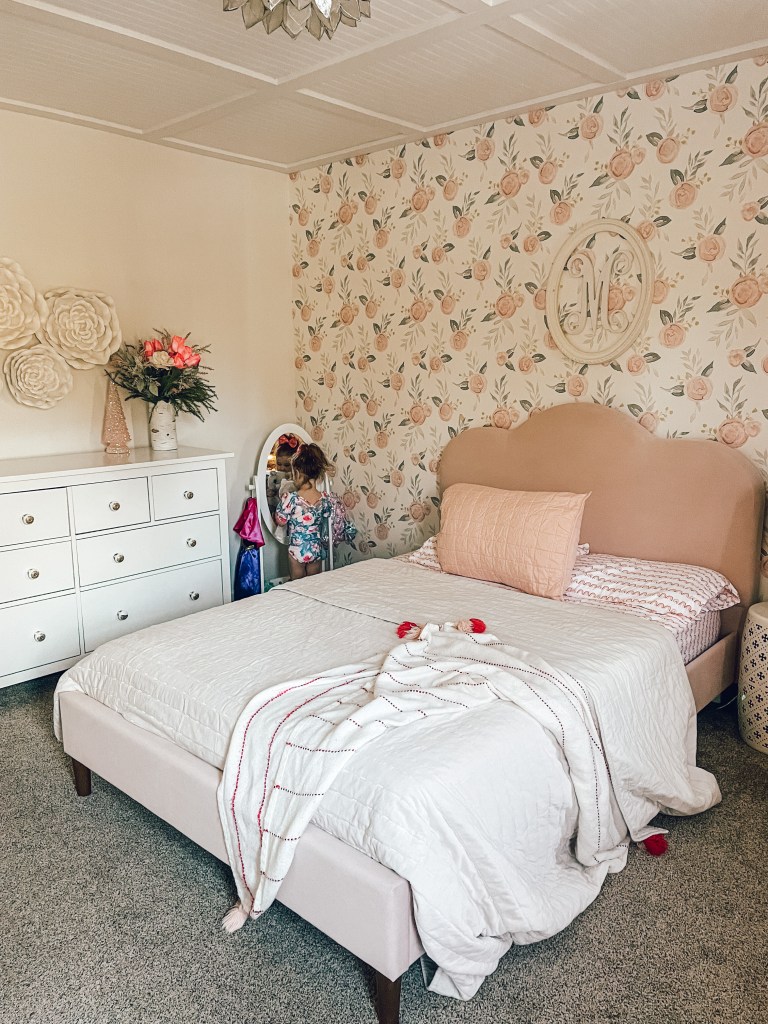
Mya’s Big Girl Bedroom Remodel // DIY Beadboard Ceiling Tutorial
Mya’s room is a great example of how I incorporate different sheens – her walls are satin and her beadboard ceiling is a flat sheen.
The second rule of thumb is that the lower the sheen, the less ability to wipe down the walls without affecting the paint itself. If you have a room that may need to be wiped down more often (kitchen, bathrooms, kid’s rooms), I would do a satin or even a semi-gloss on those walls to be sure they can be cleaned often.
Since ceilings so rarely need to be cleaned and rarely have imperfections, I always choose to do these in a flat sheen. It also helps to avoid any high shine and bounce off your overhead lights. I used SW Peppercorn for our basement exposed ceiling in a flat sheen and it’s low-shine is great for the sunlight that streams in and the overhead lights that are the main source down there.

Murphy Bed Tutorial COMING SOON!!
For trimwork, baseboards, and window casings, I prefer to go one level higher in sheen from the wall sheen. For instance, if you used satin on your walls, do your trimwork in a semi-gloss sheen. If you chose flat on your walls, go with an eggshell or a satin. You’ll want them to be a different sheen to highlight them well.
Do You Use a Brush, a Roller, or a Sprayer?
I love to use a paint sprayer. The finish is the smoothest, the space has the least amount of imperfections, and it can be painted quickly each time. However, it all comes down to WHAT you are painting to determine if the sprayer will be the best option. If you have an entire room that you are painting the same color and same sheen, a sprayer will be a great choice. If you are only painting one part of your room (just a ceiling or just the woodwork), the paint spryer will be far too time-consuming to make it worth your while.

When it comes to using your sprayer, you need to cover absolutely EVERYTHING that you don’t want painted. This requires a sizeable amount of taping and tarping prior to your paint job. When I painted our exposed ceiling with a paint sprayer, it took me roughly two days to cover everything in the room to avoid the overspray that comes off the sprayer. You must look at the amount of prepwork required vs. the amount of space being painted and weigh if it will be worth it for you. If you’re willing to put the time into prepping your space from overspray, the results will be quick and absolutely flawless when you’re finished.

Our Fixer Upper Paint and Stain Colors
With many of our spaces, I chose to use a roller instead of spraying because the prepwork to cover the whole wall of built-ins, the ceiling, the floor, and the closet and doors will take me ages. Instead, I use my very favorite paint brush and roller to paint the walls instead. I cut in all the edges with my Wooster 1.5″ angled brush (my absolute favorite for EVERY project!) and then roll the walls with a 3/8″ nap roller (all linked below!).
Do I Just Hire Someone to Paint?
With the amount of paint projects that I’ve completed in the three houses we lived in together, I’ve hired out to have our house painted and I’ve completed my fair share of DIY paint jobs. With the exterior of our house, it was an instant YES from me. With the sheer height of our house, there was no convincing me to get on a ladder to paint the exterior! It was all worth it in the prepwork, the wood repair, and the bravery they showed with the height of their ladders! To paint our entire exterior, we paid roughly $2500 to pay for the repair and for the completed paint job and installation of our exterior shutters. You can find all the details and the before and after shots of our exterior remodel here!

When it comes to our interior, we did hire out painters during our main level remodel to complete all of our painting. We have a lot of woodwork in our main level (especially our living room) and I wanted to have the appropriate enamel paint sprayed on the woodwork to avoid the impending scuffs and scrapes that they would face in a house with little ones. My paint sprayer does not handle enamel paints well without clogging and being a nightmare to clean. To have their appropriate tools was enough for me to hire out. Beyond that, we had a textured ceiling that would require extra care and a brand new set of baseboards that needed a different sheen. To complete all of that would have been an extremely daunting task that took them only 2 days. In all, our main level remodel paint cost us roughly $5500.

Painters typically charge about $5-$10 per square foot or they will charge around $50-$70 per hour, depending on how they calculate. When determining square footage, don’t forget that ceilings count in that measurement, as well.
Windows, Doors, Fireplaces and Everything In Between?
Many of these “extra” pieces that need to be painted in our homes can best be done using Sherwin Williams Emerald Urethane Trim Enamel paint. I LOOOOOVVVEEE this type of paint. A self-leveling enamel paint that hardens quickly and with a smooth finish. No stress over brush strokes because it settles those out on its own as it dries and hardens. It’s the perfect paint choice that I used for our main staircase remodel, for our fireplace in our basement, and for our doors throughout our basement.

This paint can run at a pretty high cost so make sure you’re purchasing this during Sherwin William’s big sales they run throughout the year! I picked my can up at 40% off during their paint and stain sale and it cut a HUGE cost for me. **SALE CURRENTLY HAPPENING NOW!!!**
If you’re painting windows or a door with glass inserts, a great trick is to use a liquid mask and peel. You paint this product onto your glass and it creates a barrier between your paint and the actual glass while you paint. When you finish, the product just peels right off (in the most cathartic and relaxing way!) and leaves behind clean glass without having to mess with taping off such a massive and tedious area.
My Go-To Paint Supplies
Through years and years of paint projects, I’ve found my very favorite paint products that I swear by. These are tried and true and TESTED through the years and I buy them over and over and over again!

1 // Purdy White Dove 3-Pack 9-in x 3/8-in Nap Woven Acrylic Fiber Paint Roller Cover – This particular brand makes such high-quality pieces that LAST. I’ve found that these particular rollers, with the 3/8″ nap, have been perfect for smooth AND textured walls, and they hold paint so well. They don’t soak it all in nor do they repel the paint as some do. You’re not having to reload the roller constantly with this set, which is always a major time (and back!) saver.
2 // Wooster 1-1/2″ Edge Angle Brush – My go-to always. I love an angled brush because I’m not known to use painters tape to edge out a space. The angle on this brush helps for all your cutting out and the long handle is ergonomic to keep your hands from getting sore when you’re doing large projects.
3 // HANDy Paint Cup 16-fl oz Paint Pail – I used to just use a plastic cup when I was edging out a high space until I purchased this for just a few dollars and realized how much easier my life could be. The handle is a game-changer. No more setting your cup down on your ladder and then sending it flying after any bump. This paint pail handle fits nicely in your hand OR can slip in one of the holes at the top of your ladder.
4 // FLOOD Floetrol – If you have a project like hand rails or furniture that you’re painting with a brush, you’ll need this Floetrol. It flows and self-levels your paint so you don’t have to deal with obvious brush strokes. I used this on my railing and it’s as smooth as glass!
5 // 3M COMPANY Patch Plus Primer – As much as I hate the process, patching almost always is associated with painting. You’ll need to fill nail holes, repair dings and dents, or in extreme cases, you’ll have to skim coat areas (ahem…stickers that pulled away drywall!). I love this spackle because it’s a patch and primer in one. After you apply, wipe off with a damp rag and then you’re ready to paint. No extra steps needed.
6 // Graco 17A466 TrueCoat 360 DS Paint Sprayer – My holy grail of paint sprayers. I’ve used the daylights out of this guy when I sprayed my garage walls and currently, my basement ceiling. It’s always a consistent spray, easy to reload, and the clean-up takes less than 20 minutes. It’s also a step above many others because it pulls the paint out of the disposable cups WITHOUT a straw, allowing you to spray in all angles and directions. Many others use a straw feature to pull your paint through, prohibiting the angle you can hold the sprayer and forcing you to constantly reload. Big or little jobs, this paint sprayer has been a major time-saver and gives you flawless results time after time.
7 // Wagner PaintStick EZ Roller Inner-Fed Paint Roller – If you’re painting a ceiling or a very high wall, this paint roller has been a welcome addition to my arsenal because it HOLDS 22 OUNCES IN THE STICK! Yep, no up and down to re-roll your roller in the paint tray. No more drips as you lift it up and down. It’s all held in the stick to allow for consistent painting and minimal refills.
8 // Slobproof Touch-Up Paint Pen – When you’re paint project is complete, we typically try our best to reseal our paint cans to only realize it’s gone bad a year later when you need it to touch-up. No matter how I reseal a can, it doesn’t last. These touch-up paint pens hold paint for SEVEN YEARS without turning. Seven years to easily touch up your walls, furniture, or ceilings. They’re incredible!
9 // Reusable Half Face Cover Mask with Safety Glasses – I added this to the list because how beneficial it’s been for me as I’m working through my basement ceiling. I’m in an enclosed space with no ability for air-flow due to the cold temperatures outside. The fumes aren’t terrible, but they are there. We get one body with one set of lungs. I’d prefer to keep them clear of whatever is in the paint falling down on me as I spray. PLUS, it keeps your face paint splatter-free. Key for the projects that we do in between school pick-ups and date nights.
10 // Intex Canvas 6-ft x 9-ft Drop Cloth – Plastic sheeting is inexpensive, but it’s also extremely flimsy and difficult to work with on the ground. Paint drops on plastic and it stays there, giving more opportunities for you to step in it and carry it around. With canvas, the paint gets absorbed and dries quickly, it stays in place better, and it lasts more than just one project. It’s an investment but it’s worthwhile!
11 // FrogTape Multi-Surface 1.88-in x 60 Yards Painters Tape – I mentioned earlier that I don’t use painters tape to cut out a room; however, when I need it to cover important pieces that I don’t want ruined (outlets, hardware, fixtures) or if I’m painting a design like stripes, I only use this Frog Tape. It’s created to adhere to your surfaces when it gets wet, like when paint comes in contact with it. If you want to ensure you get smooth lines, run a damp rag over the painters tape to create a bond even before you start painting. Crisp, clean lines…here you come!
12 // Medtecs Hazmat Suits – Another silly one UNLESS you’re painting a ceiling. Believe me, you will get covered. You will have splatter all over your clothes. Your hair. Your everything. These suits are so valuable to keep you clean from head to toe. Yes, you’ll look ridiculous. But you’ll love it when you’re not finding flecks of paint all over your body the next day.
Need a little inspiration for your next paint project? Check out some of the places that paint have transformed my home!
DIY Painted Rattan Writer’s Desk

My Favorite Black and Charcoal Paint Colors


Board and Batten Paint Colors (and Examples to Prove it!)

One Room Challenge: Laundry Room

5 Favorite Exterior White Paint Colors


 My Tried and True Paint Supplies for Every Project
 Board and Batten Paint Colors – And Examples to Prove It!
 How to Skim Coat Damaged Walls
 Painted Brick Fireplace Tutorial


Leave a Reply