I did it! I turned a cheap, dark brown, basic coffee table into a beautiful, nautical-inspired, light and airy end of bed bench for…$28!!
Earlier this week, I shared some of my very favorite bedroom benches that are on the market today.

All beautiful in their own way, all extremely easy to order, get shipped right to your door, and assembled quickly in an afternoon. If you don’t have the time, go for it. Buy a beautiful piece that makes the perfect book end to your bed.
But if you have a couple afternoons open in the near future, this DIY is absolutely worth it. And what I truly believe to be the best part of it? You can find a coffee table at your local thrift store, on Facebook Marketplace, on Nextdoor, on Craiglist, by driving through your neighborhood on large trash pick-up day. It doesn’t matter where you search. You’re just looking for a coffee table that has a rectangular shape with solid legs.

The top? Doesn’t matter. I don’t care if it’s scratched, if it has chips, has paint or stain missing. It’s all covered up, so go ahead and buy that $5 coffee table that nobody else wants and make something absolutely stunning with it!

HERE’S WHAT I USED
- Above-mentioned thrift store coffee table – mine was purchased off Craiglist
- 80 grit sandpaper
- 150 grit sandpaper
- Stain color of choice – I used Minwax Rustic Beige
- Rag or old t-shirt
- Foam – large enough to fit on top of the coffee table
- Scissors
- Spray adhesive
- Heavy duty stapler
- Quilt batting
- Fabric – cut large enough to cover the top of your coffee table + excess to staple underneath
- Rope
- Hot glue gun
THE PROCESS
I had previously done this project (albeit very sloppily now that I’m looking back on it) so my first step was to remove all staples in the wood that wouldn’t be covered by my fabric. Using a flathead screwdriver and needle-nose pliers, I removed all staples and got myself a nice clean surface ready to sand. Although your table may not have staples on the wood, take this time to remove hardware, stickers, gunk, or whatever may be on the surface that you need to clear prior to sanding.

Using 80 grit sandpaper, I hand sanded all the corners and tight spaces around the coffee table that I knew my orbital sander wouldn’t be able to adequately reach. I also focused on sanding carefully on the coffee table’s details to not cause any imperfections by being too rough.
And got some help from some cuties around the house…


The legs of my coffee table were flat and straight which made it a breeze to use my orbital sander and quickly sand the brown paint off the surface. What remained was a gorgeous white oak that made me even question if I wanted to change it at all. I was already in love.
Finally, I quickly hand sanded all the surfaces with 150 grit sandpaper to make a soft, smooth finish to the wood that was ready to be stained.

I chose Minwax Rustic Beige for my stain color because it immediately stuck out of the group for his light, natural wood tones with the very subtle hints of gray. I didn’t want to darken the wood much but instead, give it a richness that would blend well with the light and dark woods within my bedroom.

To stain, I cut an old T-shirt into a 12″ x 12″ sections and gently dipped just the end into the stain. I would always rather put on too light of a coat than too much. You can always add more but it’s a lot more difficult to take it away! So dab lightly into your stain and slide it along the lip to get even more off before you touch the wood.
I gently rubbed the stain along the wood, just being sure each space is covered without having too much excess that would allow for drips or uneven coloring.

I allowed the stain to set overnight to fully soak in the wood before assessing the color. The next day I was thrilled with the color and was ready to tackle the upholstering!
UPHOLSTERING THE BENCH
As mentioned before, I’ve done this project before with this coffee table so I have foam already cut to fit the top of the table. However, I had some 1″ foam lying around the house and I wanted to add it to the top to make a 3″ foam pad to this bench. I firmly believe that 2″ is more than adequate for the top of a bench, but feel free to add to the size you’d like.

To cut, I sat the coffee table upright and placed the foam on top. I used sharp scissors to cut right along the edge of the wood all the way around. You also could lay the foam on the ground, place the coffee upside down on top and then use a pen to trace around the table and cut after removing the table OR use an X-acto knife to cut around it. Use the method you feel most comfortable with.

To keep your foam from sliding, use a spray adhesive to spray on the top of your coffee table and attach your foam. Allow to dry as your can instructs before moving on.
Next is to lay out your quilt batting on the floor, stretched out. Turn your coffee table upside down on the batting. Cut down your batting to be enough to cover the table top, as well as leaving excess on each side to wrap around the top and staple underneath.
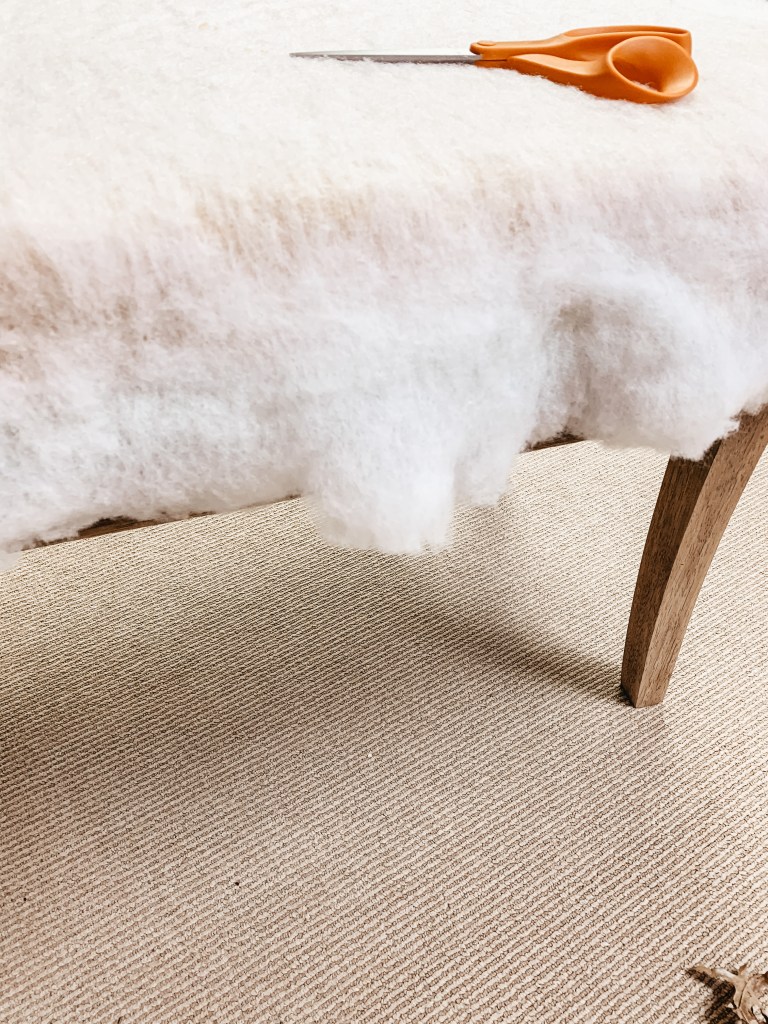
Once cut, gently pull on the batting to wrap around the top and begin stapling around the edges, leaving the corners for last. You’ll see that as you pull the batting, your foam will begin to bend and curve. Be sure you are stapling close enough that there aren’t obvious pulls on your foam in places. You’ll want to have a smooth side and the batting will help create that for you.

To staple the corners, take the two sides and close them together to make a sort of triangle with the fabric. Tuck and fold that triangle to make a smooth corner and staple as much as necessary to keep fabric flattened and in place.

You’re ready for the fabric!
Be sure to iron your fabric prior to laying it out. This will help you avoid any wrinkles on your bench top.

Lay your fabric on the floor and smooth out as much as possible. Carefully lay your padded coffee table upside down on your fabric and cut as you did with your batting, leaving enough on each side to wrap around your foam and batting and to staple underneath.
To start your stapling process, I recommend starting on the back edge of your bench so you can have less worry about perfection just yet. Finish with the side that will be most visible, more than likely the front, to really get the process down first.

Using the same method as your batting, gently pull your fabric to the underside and staple. Work your way around the table, leaving the corners for last. Watch to see how close you’ll need the staples to be as you see how the foam pulls.
When it’s time for the corners, pull the fabric from the two sides together into the triangle method, as you did for the batting. Because this will visible, you’ll want to work with the fabric, tucking and stapling to get the fold you are looking for at each corner. Take your time on this step. I personally feel that this step of the process is the difference between the look of a DIY and one that looks like it was off the market.

FINISHES
I purchased a cotton rope from Joann Fabrics to help give a finishing touch to this bench. When dealing with cutting fabric, there’s always a tendency to have choppy, frayed ends that I didn’t want showing underneath the bench. To remedy that, I purchased this rope to cover all the staples and fabric ends by hot gluing it around the base of the table top.

It’s a quick, easy, inexpensive way to give a more finished look to the bench and gives a very final touch that makes it look like it’s not a DIY.

COST BREAKDOWN
Here’s the cost of every material, giving you the total cost if you started without anything. So, keep in mind your cost is going to be significantly lower if you already have the base materials (stapler, foam, table, etc.).
- Old coffee table – mine was purchased off Craiglist for $10
- 80 grit sandpaper – $7.98
- 150 grit sandpaper – $4.97
- Stain color of choice – I used Minwax Rustic Beige – $7.98
- Rag or old t-shirt
- Foam large enough to fit on top of the coffee table – 3′ x 2″ pieces $25.98
- Scissors – $3.00
- Spray adhesive – $5.99
- Heavy duty stapler – $15.99
- Quilt batting – $5.99
- Fabric – cut large enough to cover the top of your coffee table + excess to staple underneath – $6.99
- Rope – $3.49
- Hot glue gun – $12.49
My Total Cost:: $28.46
Total Cost if you had NO materials to start with:: $110.85

I love this beautiful finishing touch this adds to my master bedroom. It’s a space we haven’t remodeled or updated in the least, but pieces like this make it feel pulled together, even when it isn’t perfect just yet. I love a good DIY that makes a huge difference in a room and this DIY bench is just what I was looking for. You’ve got this!!

xx Rachel

 Save Vs. Splurge: Bedroom Edition
 Mya’s Big Girl Bed + Room Refresh
 DIY Wood Coffee Table
 Baby Girl Nursery Reveal


Leave a Reply